In Denver, CO, where the balance between seasonal weather and vibrant interior aesthetics matters to homeowners, painting your kitchen or bathroom cabinets can be a powerful, affordable way to breathe new life into your space. Yet despite the appeal of a quick refresh, cabinet painting is fraught with mistakes that can lead to peeling paint, streaks, or a worn-down look far too soon. At Dream Painting LLC, we believe in educating our community so they can make informed choices—whether you plan to DIY or work with seasoned professionals. Let’s explore the most common pitfalls people make during cabinet painting and how to avoid them for long-lasting, beautiful results.
Key Takeaway:
Avoiding common mistakes in cabinet painting requires the right prep work, tools, and expertise—leading to flawless finishes and cabinets that last.
Preparation Pitfalls: What Goes Wrong Before Painting Even Starts
Skipping Proper Cleaning
Cabinets, especially in kitchens, collect grease and grime over the years. Jumping straight to sanding or priming without a thorough degreasing step means your paint won’t adhere correctly. It may look fine for a few weeks but will eventually peel. A solution of trisodium phosphate or a high-quality degreaser is essential. Cleaning is not glamorous, but it’s the foundation of any successful cabinet painting.
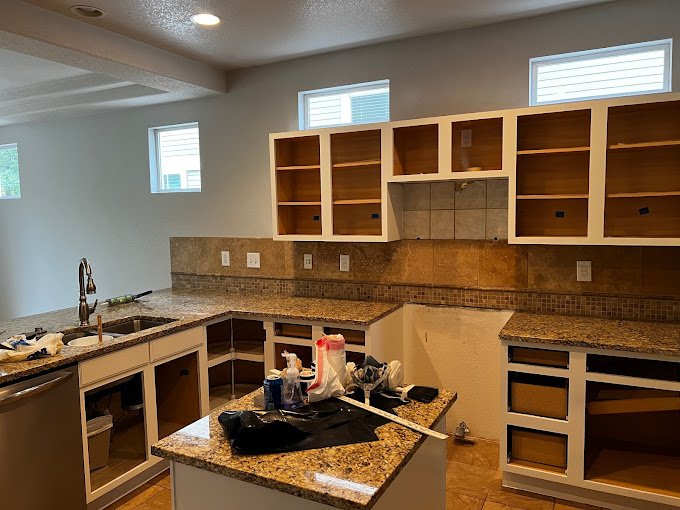
Forgetting to Label or Remove Hardware
Another common misstep is failing to remove doors, drawers, and hardware before painting. Not only does this make the job harder, but it also leaves behind unpainted areas that look unprofessional. Labeling the components ensures they go back in the right place, helping your final result look seamless.
Neglecting Sanding or Priming
Cabinet surfaces—especially those finished with factory varnish or laminate—require sanding to create surface “tooth.” Likewise, priming is necessary to block tannins in wood or oil residue. Skipping either step may save time short term, but leads to a flaky or blotchy finish later on.
Technique Troubles: Mistakes During Application
Using the Wrong Type of Paint
Not all paints are created equal. Standard wall paint isn’t durable enough for cabinets that face daily wear and tear. High-quality enamel or acrylic latex paints designed for trim and cabinetry are the gold standard. These resist chipping and can withstand regular cleaning.
Overloading the Brush or Roller
Applying too much paint at once causes drips, streaks, and uneven drying. It’s better to apply multiple thin coats, allowing adequate drying time between each. This ensures even coverage and a smooth, professional finish—especially important for high-traffic areas like banister painting.
Failing to Control the Environment
Humidity, temperature, and airflow all impact drying. Painting in a damp basement or during a humid Denver summer day may extend drying time or cause bubbling. Proper ventilation and climate control are essential for a successful paint job, whether it’s cabinet painting or larger-scale interior painting.
Finishing Flaws: What Happens After the Paint Dries
Skipping the Cure Time
Dry paint isn’t the same as cured paint. Curing can take several days or even weeks depending on product type and weather conditions. Reinstalling hardware or using cabinets too soon can lead to dents, smudges, and scratches. Be patient—it’s worth it.
Not Sealing Painted Cabinets
Though some paints include a hard finish, many benefit from a topcoat like polyurethane or a clear acrylic sealer. This adds longevity and makes cleaning easier. Painted cabinets in bathrooms or near the stove are particularly vulnerable to moisture and grease, so sealing offers an added layer of protection.
Ignoring Small Touch-Ups
Even professionals miss a spot or leave a brush mark. The difference lies in the final inspection. Take time to inspect cabinets from all angles and perform necessary touch-ups to ensure your cabinets look just as polished as your new lime wash exterior wall or freshly painted fence.
Other Overlooked Elements: Materials and Accessories
Choosing Poor Quality Brushes or Rollers
Good tools are just as important as good paint. Cheap brushes can shed bristles and leave marks, while low-quality rollers may cause stippling or inconsistent texture. For a smooth surface—especially on cabinetry and hand rails—invest in professional-grade applicators.
Not Considering the Underlying Surface
Different materials require different approaches. Laminate needs specific bonding primers, while wood with existing stain may require extra sanding and a shellac-based primer. Understanding your cabinet material helps ensure a beautiful, even finish.
Overlooking the Style of the Cabinet
Flat-panel doors may be easier to paint, but detailed designs require careful attention to corners and edges. Using a paint sprayer can help in such cases, but it also demands experience and equipment knowledge—skills that a trusted commercial painting professional can offer.
Answering Common Questions
How long should I wait before using my painted cabinets?
It’s safe to gently reinstall cabinet doors after 48 hours in most cases, but the paint typically takes 7–30 days to fully cure. Avoid heavy use during this time to prevent damage.
Can I paint laminate cabinets?
Yes, but they require special prep including sanding, cleaning, and a high-bonding primer. Skipping any step will lead to peeling and poor adhesion.
What’s the best paint for cabinets?
Acrylic latex or alkyd-based enamel paints are the most durable and provide a professional look. They’re specifically designed to withstand moisture, grease, and constant handling.
The Role of Proper Prep in Long-Term Results
Skipping proper prep work is like building a house on sand. It doesn’t matter how great the paint is—it won’t last. In Denver homes, where fluctuating humidity and temperature are common, the paint needs to grip tightly to a clean, primed surface to resist expansion and contraction. The difference between DIY disappointment and long-term satisfaction often starts before the paint ever hits the wood.
The Link Between Technique and Finish Quality
The tools and techniques used during application directly influence the finish. Brush marks, orange peel textures, and bubbles often result from improper loading, rushing, or choosing the wrong materials. This doesn’t just affect how your cabinets look—it affects how long they last and how well they clean. A poor finish can also make your deck refinishing look out of place if you’re upgrading multiple areas at once.
When to Call in the Professionals
While some homeowners enjoy the challenge of DIY, many find that cabinet painting is far more technical than it first appears. If you’re considering other upgrades like drywall repair, skin coating, or wallpaper installation at the same time, the coordination and skill level needed quickly escalate. That’s where we come in. Dream Painting LLC is proud to serve the Denver, CO community with care, expertise, and high-quality finishes that stand the test of time.
From deck staining to stair refinishing and everything in between, we’re here to make your home truly shine.
Let’s bring your vision to life—reach out to Dream Painting LLC today.